Velvet Finishes F* Up Friday 03-04-16
March 3, 2016 • By Kellie SmithIt’s a
Velvet Finishes
Furniture Upcycle Friday!
3-4-16
Finally! Whew, where have I been? I can’t believe it’s been so long since I’ve posted a paint project! I have missed my paint brush, I assure you, but my design jobs have kept me crazy busy.
Anyhoo – I hope you like this project!

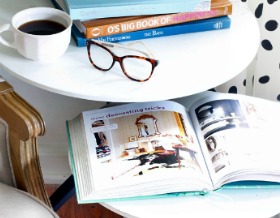
I have had this highboy piece for years. It just sat in the corner of my project pile patiently waiting.
I thought this was the perfect piece for a layered finish. And I’m going to show you just how easy it is to create with Velvet Finishes.

I used Velvet Finishes Ready, Timeless, Opulent, Minimalistic, Enhance Dark Glaze, and of course, my Reviver paint brushes.
Because I wanted a layered look, I first painted the entire piece with one good coat of Timeless, then two coats of Opulent.
When layering a piece and sanding through colors, I have found it’s best to have more than one coat of your main color. Here it’s the Opulent. You do not want to completely remove that color and using an electric sander can remove quite a bit of paint.
After I had the Timeless and Opulent on, I added Minimalistic in accent areas.

As you know, Minimalistic is thin so I did two swipes with that. I call them swipes because I did not care if the edges were perfect. I used the 1″ Reviver brush in the straight edge and just sort of slapped it on.

As you can see, the lines are not straight.
Now for the fun part. Call me weird, but I cannot tell you how much fun I have when I sand a piece. I use the Ryobi Cat Sander and I just love that thing!

On the left side of the drawer can you see that I went a little heavier and allowed the dark gray to show slightly? I like the unevenness of the color, I think it makes it look more aged and natural.
I went through all of the layers of paint on the edges. I distressed all the way down to the wood, but not perfectly even, just randomly.

I also went through the lighter gray to allow the dark gray to show where the drawer pulls will be. I usually do that behind every pull but with the style of pulls on this piece, very little of that will show.

Distress, distress, distress….
Distressing is easy, just think of where the natural wear would be and where it makes sense to have an accent.
After distressing, I used the Enhance Dark Glaze. Since I failed to take any pictures of this process, I’ll share a you tube video about glazing. (-:

I love the look that glazing provides. You could call it instant aging.
Did you notice how the raw wood stood out in the pic above, when I first sanded? By glazing over the wood, it gives it this incredible depth of color.

The great lines of this piece really gave me lots of great places to accent.

I think it turned out gorgeous!

OK, so who noticed that one of the handles is on upside down?
What. The. Crap.
I am laughing so hard right now….
Life at the Asylum.


This post contains affiliate links. If you click and purchase I may make a small commission. Yay me!! But it doesn’t cost you one red cent more. Yay you!! I call that a win/win! Thank you for helping me to buy new sanding pads for my Ryobi!
LOL on your pull. I sometimes sew like that! Your piece is truly a work of art. Thanks for sharing.
Lol!! Can you believe that I stood in front of that piece and photographed it and never noticed that? Thanks so much Sonja!!